Introduction to the New Imatest Main Window
After watching the video, follow the Step by Step Instructions Below
Select your Image + Analysis
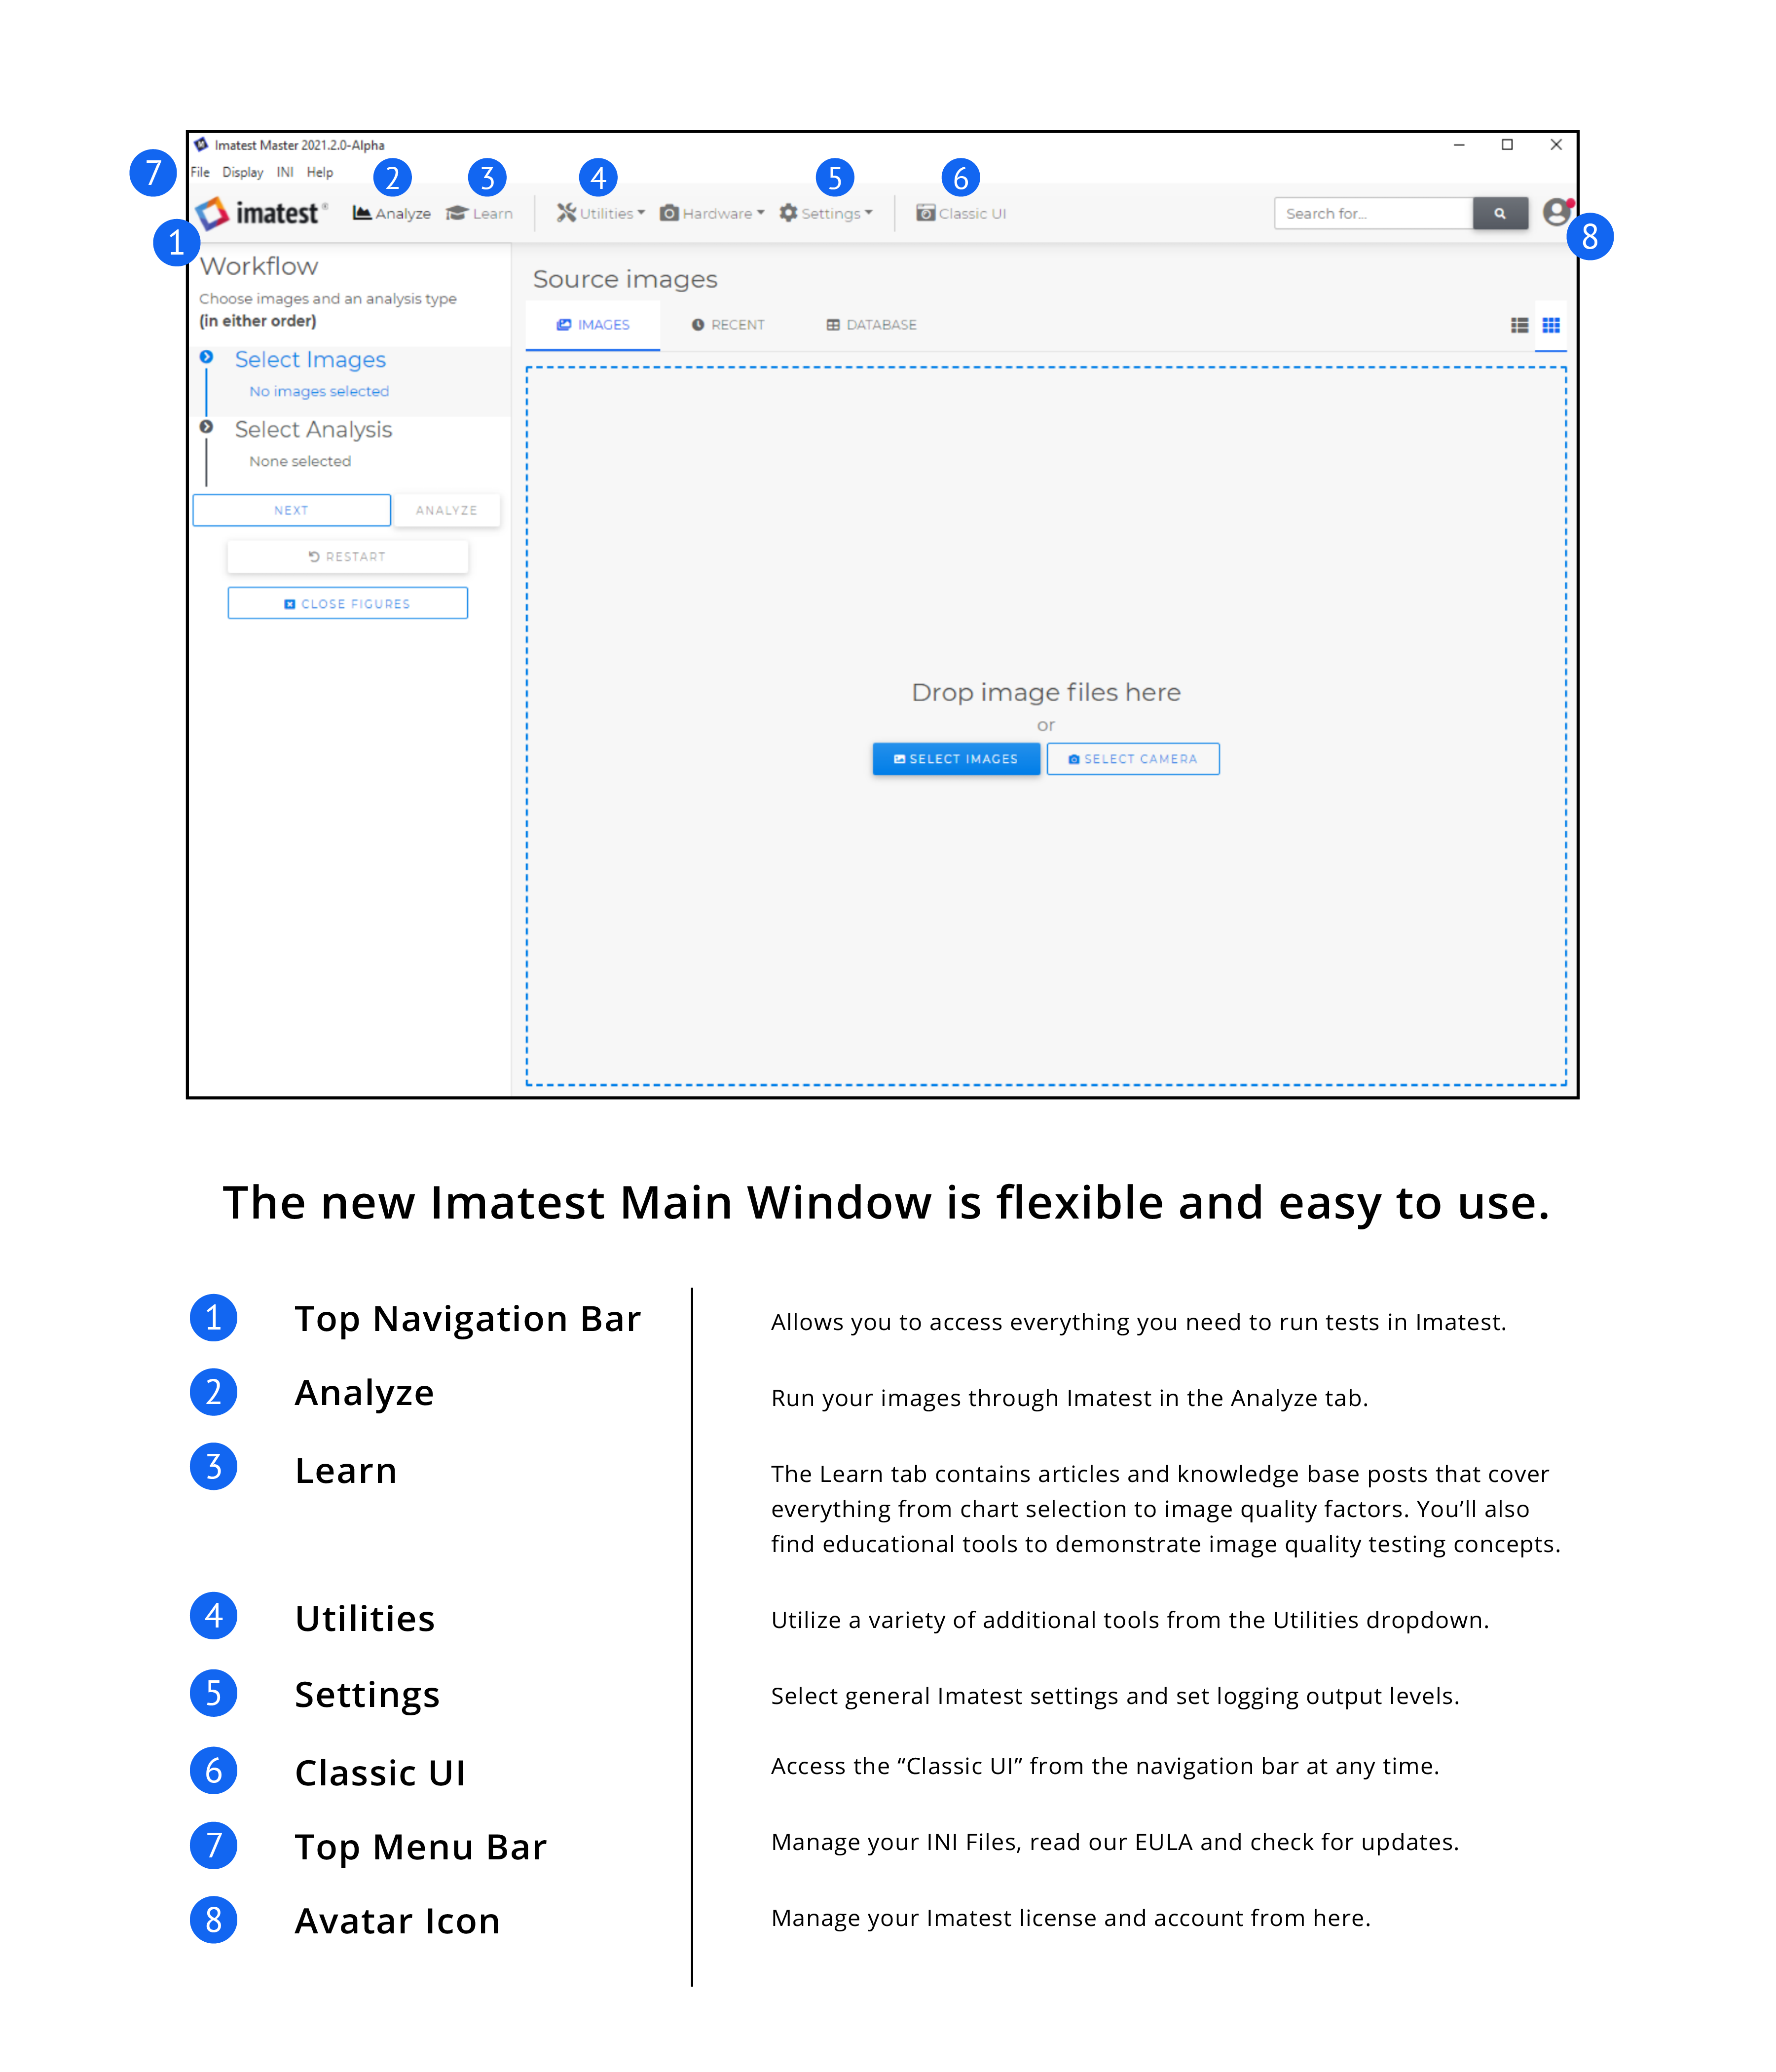
To analyze an image, click the Analyze icon in the main menu.
The window has a large area for Source images. Drag and drop images into the window, or click the “Select Images” button, and select images from folders on your computer.
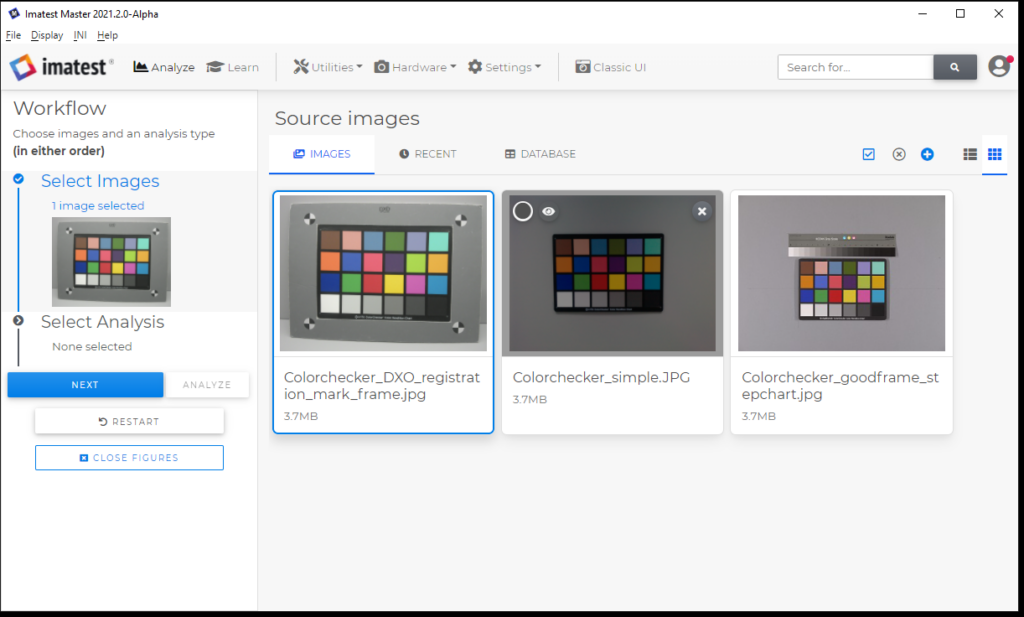
Once your images have been added to the window, they will be automatically selected for analysis. (The blue outline indicates selection.)
Use the icons in the right corner of the image window, to
- deselect images,
- add more images.
- choose List View.
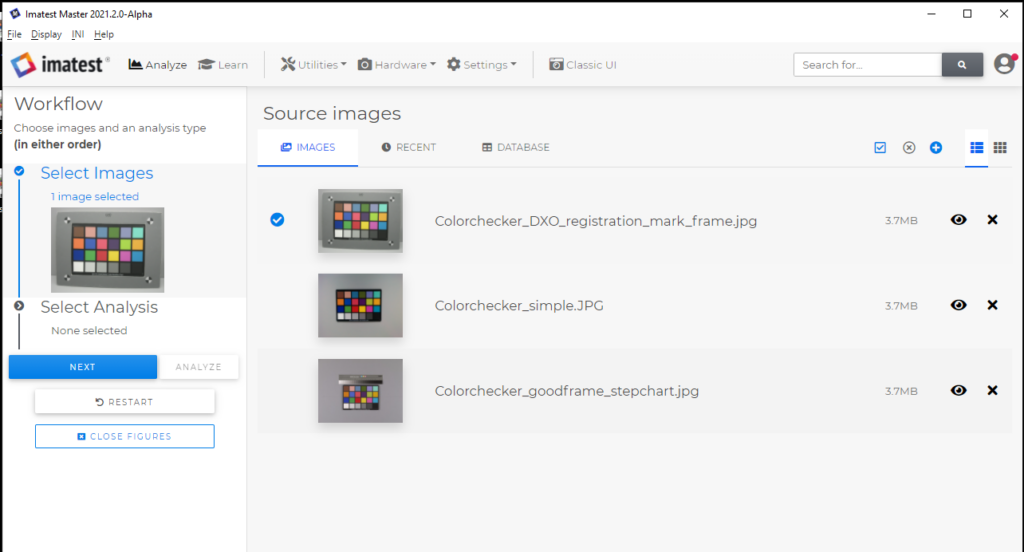
File List view
View your files in icon view (above), or list view.
Select the image(s) you wish to analyze,
then click the Next button in the left column, to select the type of Analysis.
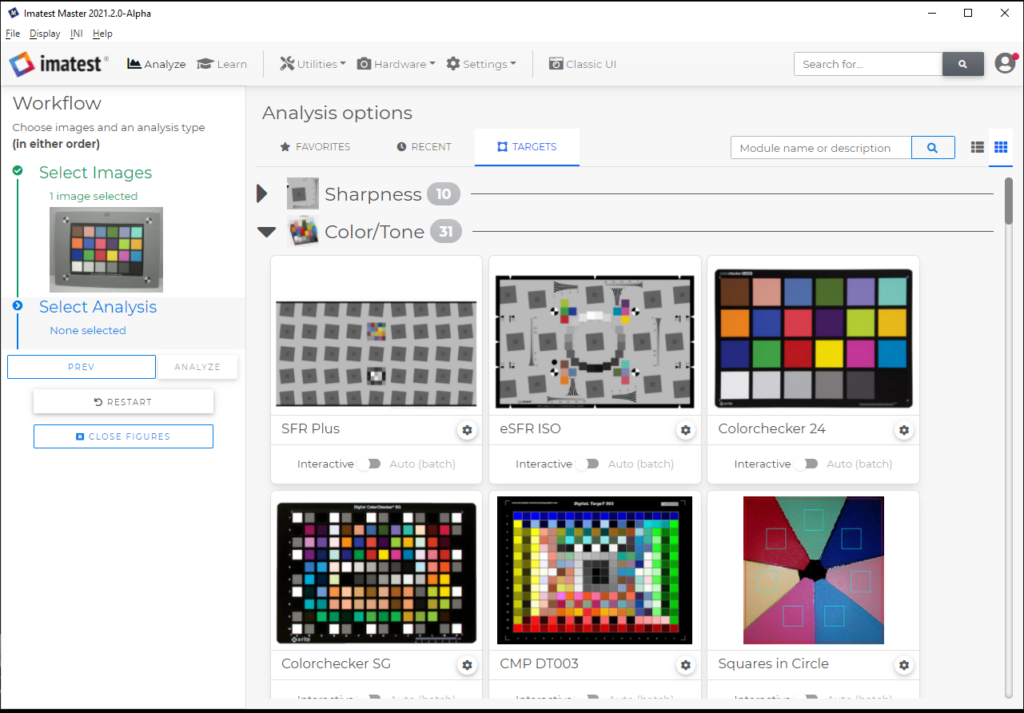
The Analysis options window will appear in the window on the right.
Analysis options are organized, based on the Image Quality Factor they measure.
Click on the triangle next to the IQF you wish to measure, to see target options.
In this example, it is Color/Tone.
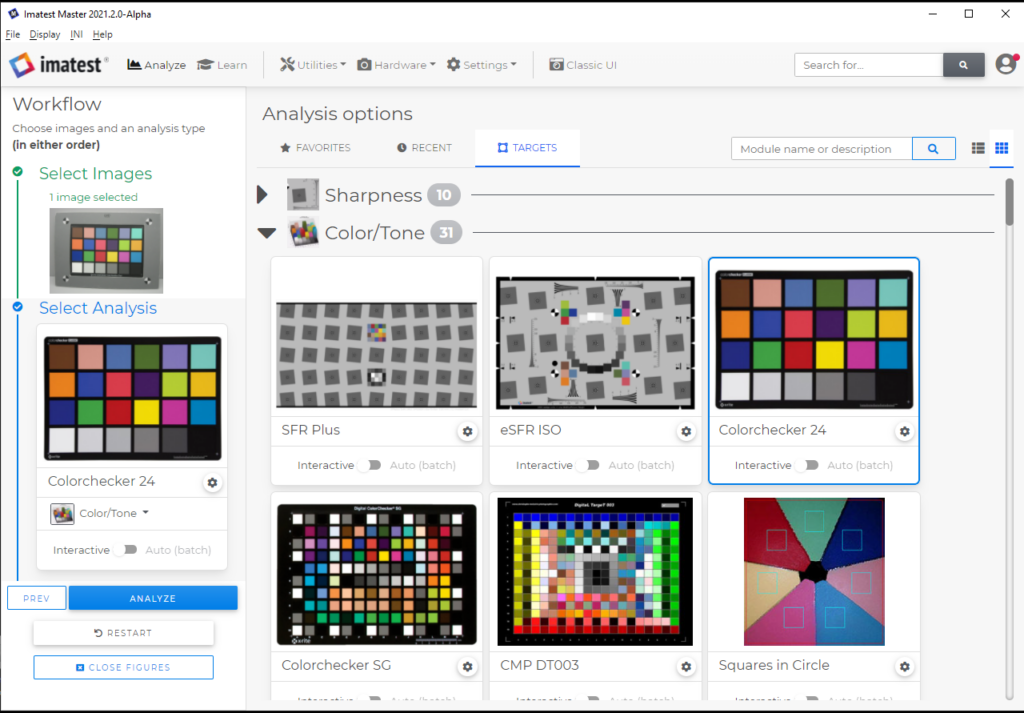
Several choices will be shown. Select the Target that was used for your image.
This image was taken with a Colorchecker 24 chart, so we can select “Colorchecker 24” by Clicking on it.
The Image and Analysis type chosen are now shown in the Left Column.
There are additional settings, to run the analysis in Interactive or Auto(Batch) mode just above the blue “Analyze” button.
Once the image and Analysis are chosen, click the blue “Analyze” button to start the Analysis.
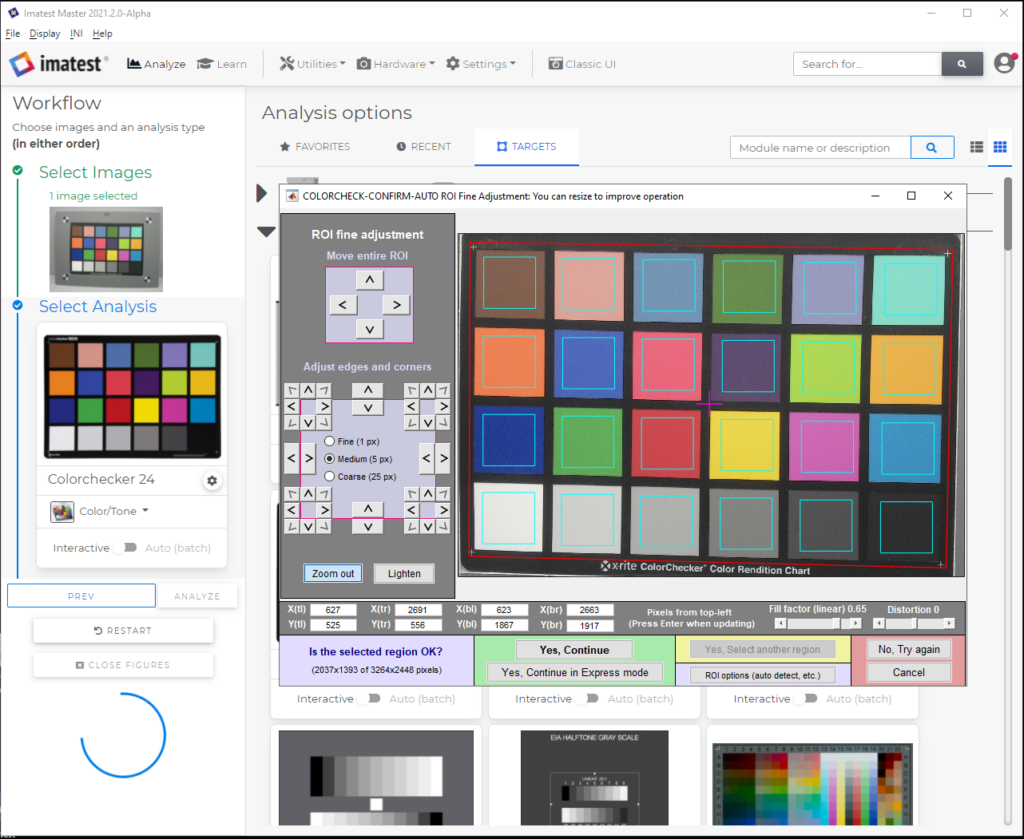
In this example, Interactive Analysis was chosen, so the ROI Adjustment Window will appear.
Adjust ROIs, if needed – then click Yes to continue analysis.
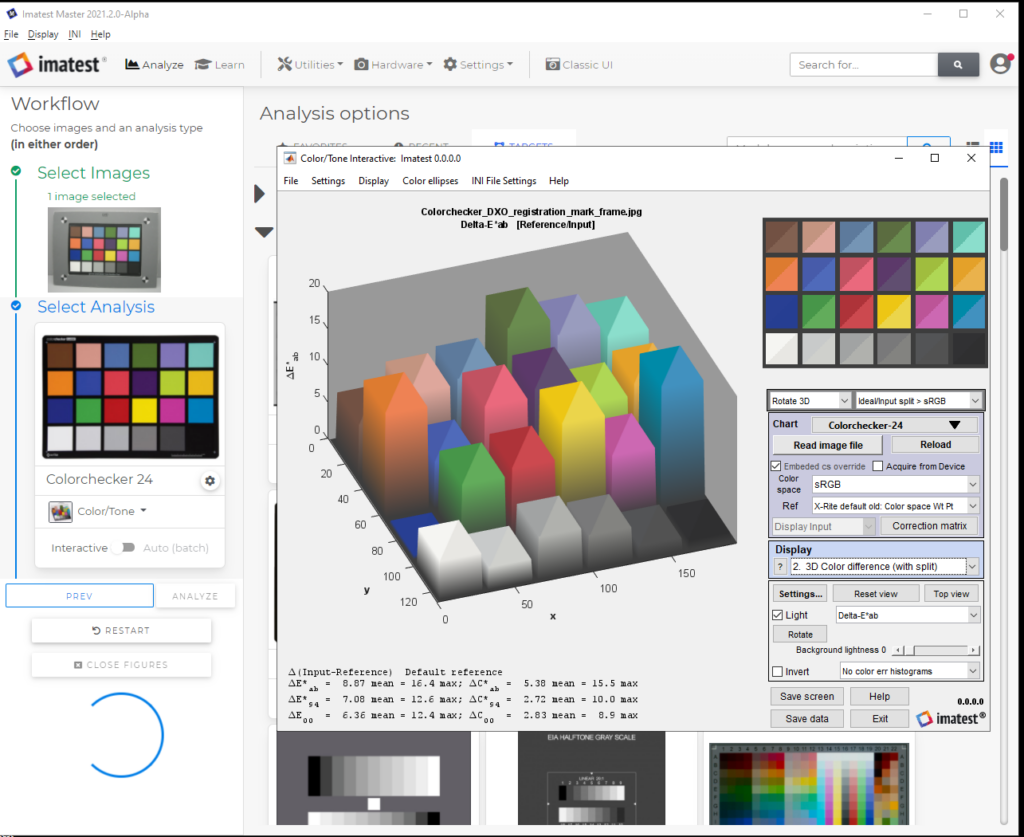
The Results window will appear.
Imatest Results Window
Imatest will run the Analysis on your image, and pop up the window that displays analysis results, based on your preferences.
Use the Display dropdown, to choose a different output graph.
Results can be saved using the Save Data or Save Screen buttons.
Click Exit to close Result window, and return to the Analysis screen.
With Imatest 2021.2, choose your Images or Analysis type first – the choice is yours.


